
The Best Classic Manicotti Recipe (Make Ahead + Freezer Friendly)
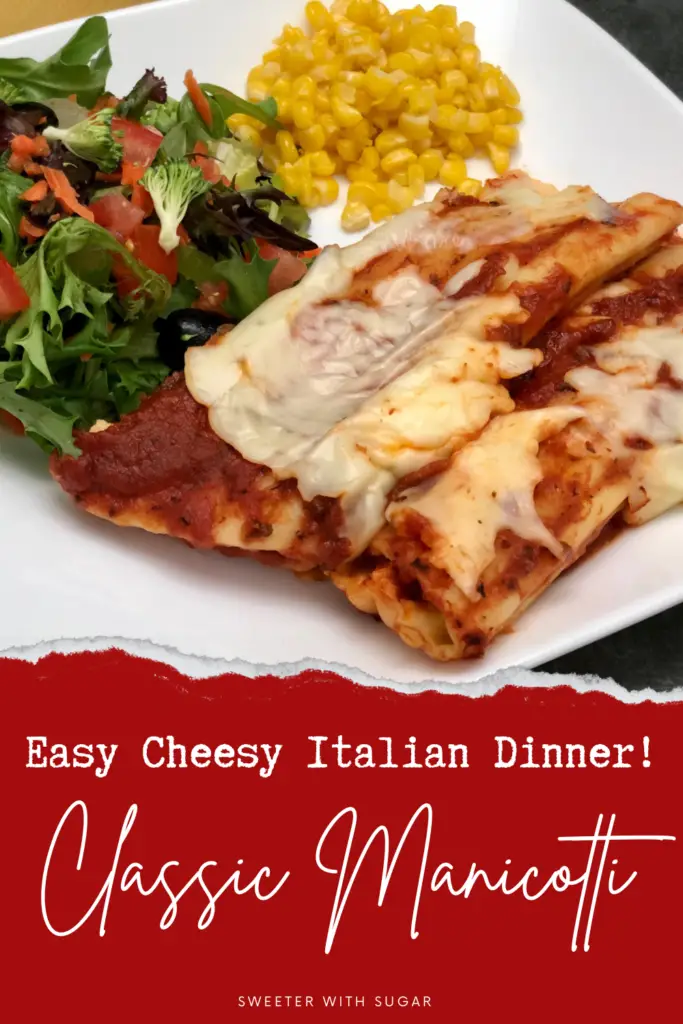
There is something so comforting about a classic manicotti recipe fresh out of the oven. Tender pasta shells filled with a creamy ricotta, mozzarella and parmesan cheeses, topped with rich marinara sauce, and baked until hot and bubbly. This dish is the perfect Italian comfort food and perfect for any day of the week.
If you’ve ever ordered manicotti at a restaurant and wondered how to make it at home, you’re in the right place. This easy baked manicotti recipe is simple enough for a weeknight dinner but special enough for holidays, Sunday dinners, or feeding a crowd. It uses basic ingredients, comes together quickly, and can even be made ahead of time or frozen for later.
Why We Love This Manicotti Recipe:
One of the best things about this classic manicotti recipe is how versatile it is. You can keep it traditional with a simple cheese filling or add spinach, ground beef, or sausage for extra flavor. Whether you’re cooking for your family or bringing a dish to share, this recipe is always a hit.
In this post, I’ll walk you through everything you need to know—from how to stuff manicotti easily (without frustration!) to tips for making it ahead, freezing it, and getting perfectly baked results every time. We have been making this recipe for forty years! We love the ease and comfort of it!
This is one of our favorite dishes. Yes, I say that a lot!! We are a family that loves good food. Getting together with family, friends, and a terrific meal is the best!
FAQs:
Can I make manicotti ahead of time?
Yes! Assemble the manicotti, cover tightly, and refrigerate up to 24 hours before baking. I do this often-make it Saturday night and cover with aluminum foil, refrigerate, and bake for Sunday family dinner. You will want to remove it from the refrigerator about 15 minutes before baking and you may need to add 5-10 minutes to the baking time. Check to see if it is hot and bubbly by inserting a fork into the middle for a few seconds-if it feels hot when you remove it-it’s ready.
Can I freeze manicotti?
Sure. Freeze before baking for best results. Cover tightly and freeze up to 3 months. Be aware however, freezing ricotta may result in a different texture, but still good. Also, I have frozen a couple baked, leftover, filled manicotti shells, I put the container right into a cold oven, after drizzling some water (about 1/8 cup, maybe a bit more) over the top of them-turned on the heat to 350 degrees. Baked until hot through-about 18 minutes-it worked, of course it wasn’t as good as freshly made-not frozen manicotti but, it worked for my lunch.
Do I need to boil manicotti noodles first?
Yes, unless using oven-ready pasta. Cook just until al dente to prevent tearing. If you over cook the noodles, and sometimes even if you do not over cook the noodles, they will tear. Just fill the torn noodles and place the torn side down. These noodle are easier to fill. 😊
What is manicotti filling made of?
Typically ricotta, mozzarella and Parmesan cheeses, egg, and seasonings.
How do I fill manicotti without breaking it?
Use a piping bag or zip-top bag with the corner cut off—it’s much easier and less messy. If you do not want to use a piping bag or Ziploc or don’t have one, use your hand to make a cylinder shape with some of the cheese mixture and place it inside the manicotti pasta, continue until all of the shells are full and no cheese mixture is left. Yes, it is messy but it works.
Cook’s Notes:
I like to slightly undercook pasta to avoid tearing-al dente or just a bit under al dente works great. Don’t be discouraged if some of the manicotti shells still tear, it happens. Just place the cheese mixture on the shell, fold the side together and place tear side down in the baking dish.
Use a piping bag for easy filling. Use your hands if you do not have one. Just place some of the cheese mixture into the end of the tube and keep adding more to fill the pasta shell. Messy but it works, too.
Add extra sauce on bottom of pan to prevent sticking. It is important to have sauce under the shells so they do not get hard on the bottom while cooking.
Cover with foil to keep moisture in, we do not want the pasta to dry out.
Let rest 5-10 minutes before serving.
Variations for Classic Manicotti Recipe:
Spinach Ricotta Manicotti-add some spinach to the egg and cheese mixture.
Meat-Filled Manicotti (ground beef or sausage)-Try our version: Creamy Italian Sausage Manicotti
Alfredo Manicotti (white sauce instead of marinara)-try our Alfredo Sauce
Cottage Cheese Version (budget-friendly swap)-use cottage cheese instead of ricotta
Gluten-Free Manicotti-look for gluten free manicotti shells
Tools/Items Helpful for This Classic Manicotti Recipe:
9×13 Foil Pans-for easy clean up
What to Serve With This Classic Manicotti Recipe:
We love many sides with this comfort food recipes as as:
Caesar Salad-try our Caesar Salad Dressing
Ingredients Needed for Classic Manicotti Recipe:
- 15 ounces Ricotta cheese
- 3 cups mozzerella cheese grated and divided
- 1/3 cup parmesan cheese
- 1 egg
- 2 tsp dried parsley
- 1/2 tsp salt
- 1/4 tsp pepper
- 24 ounces spaghetti sauce
- 8 ounces manicotti pasta shells
Instructions for Classic Manicotti Recipe:
- Bring a pot of water to a boil. Place manicotti pasta shells in the boiling water. Boil no longer than 7 minutes.
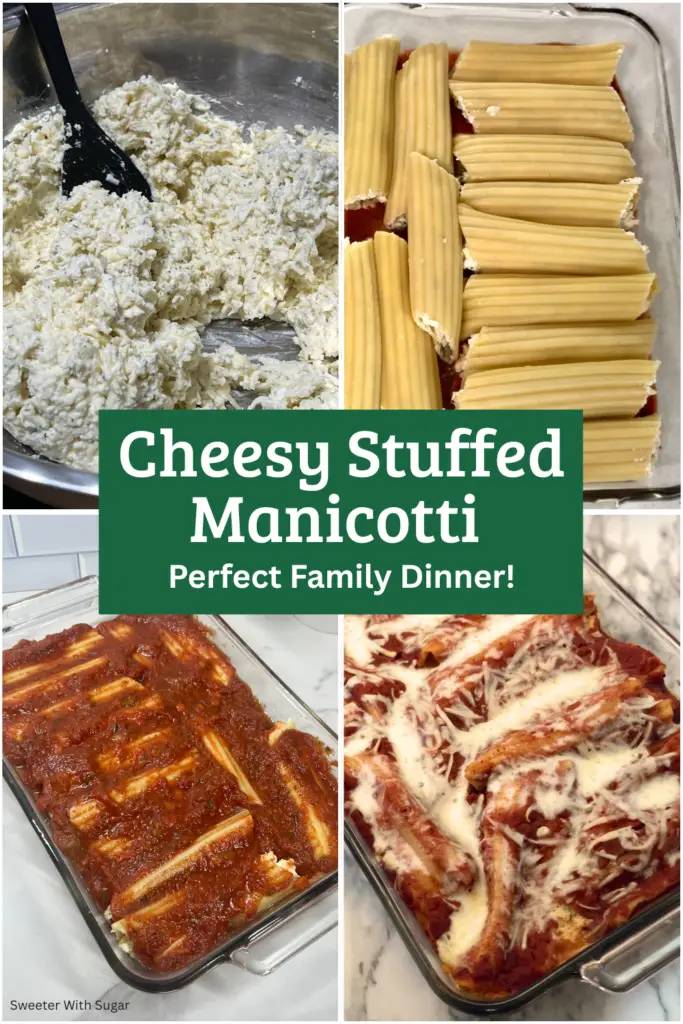
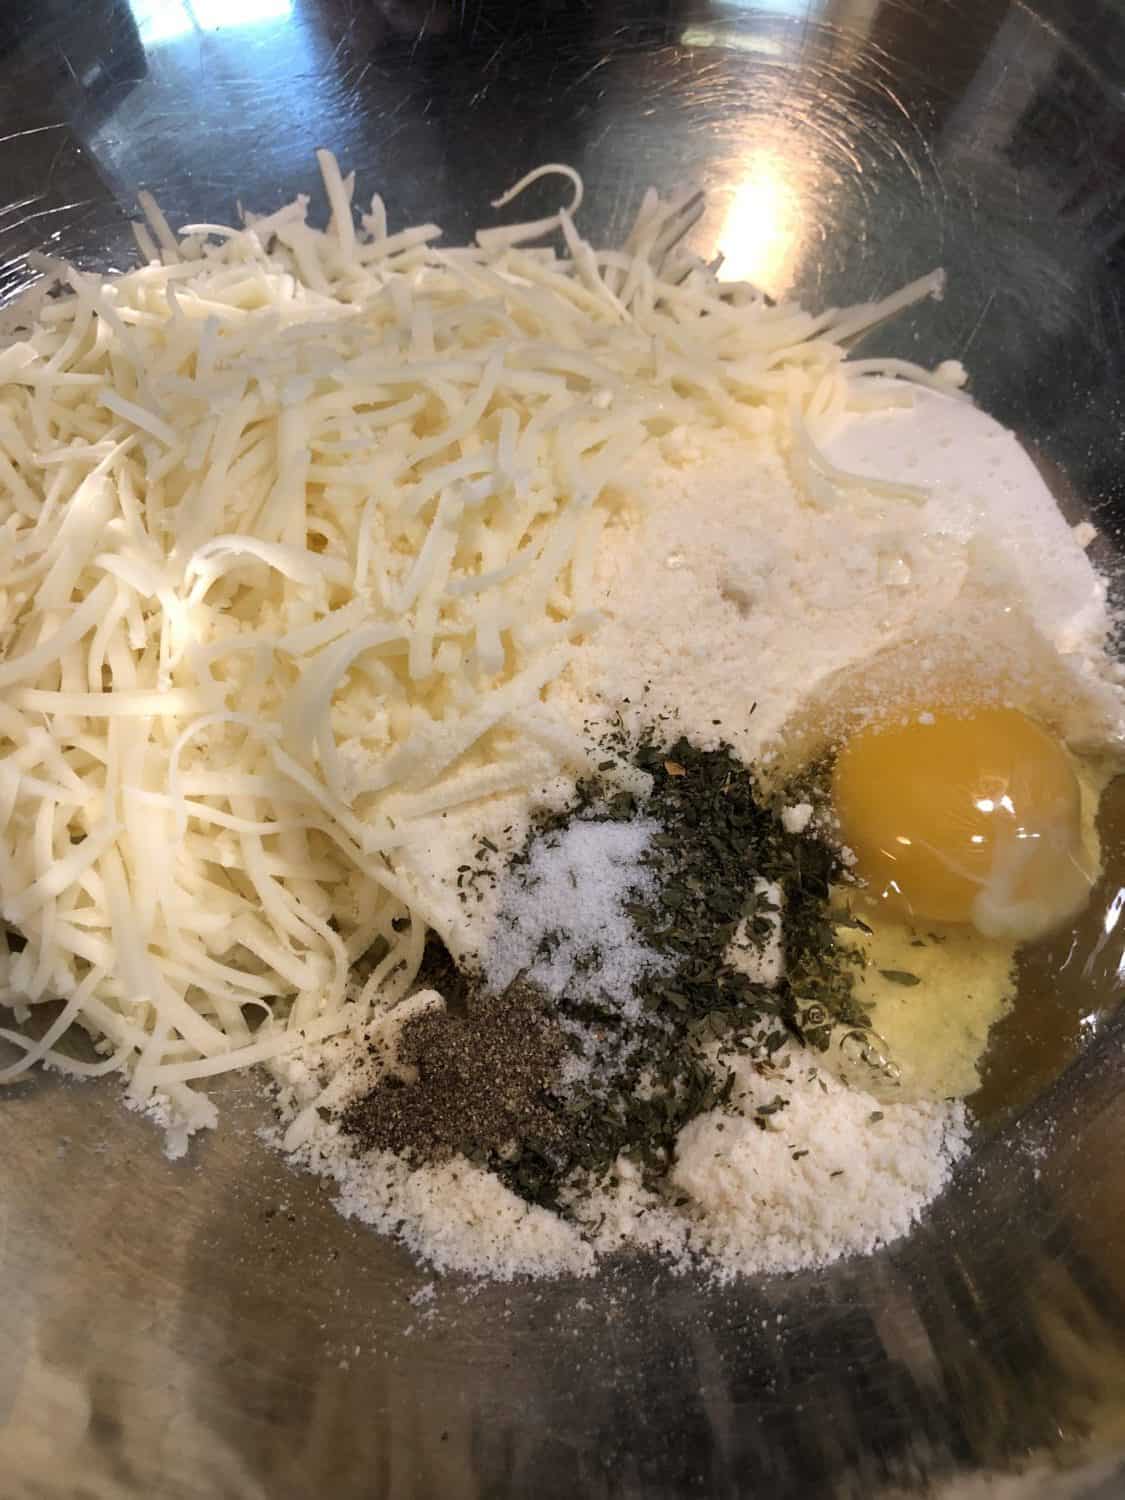
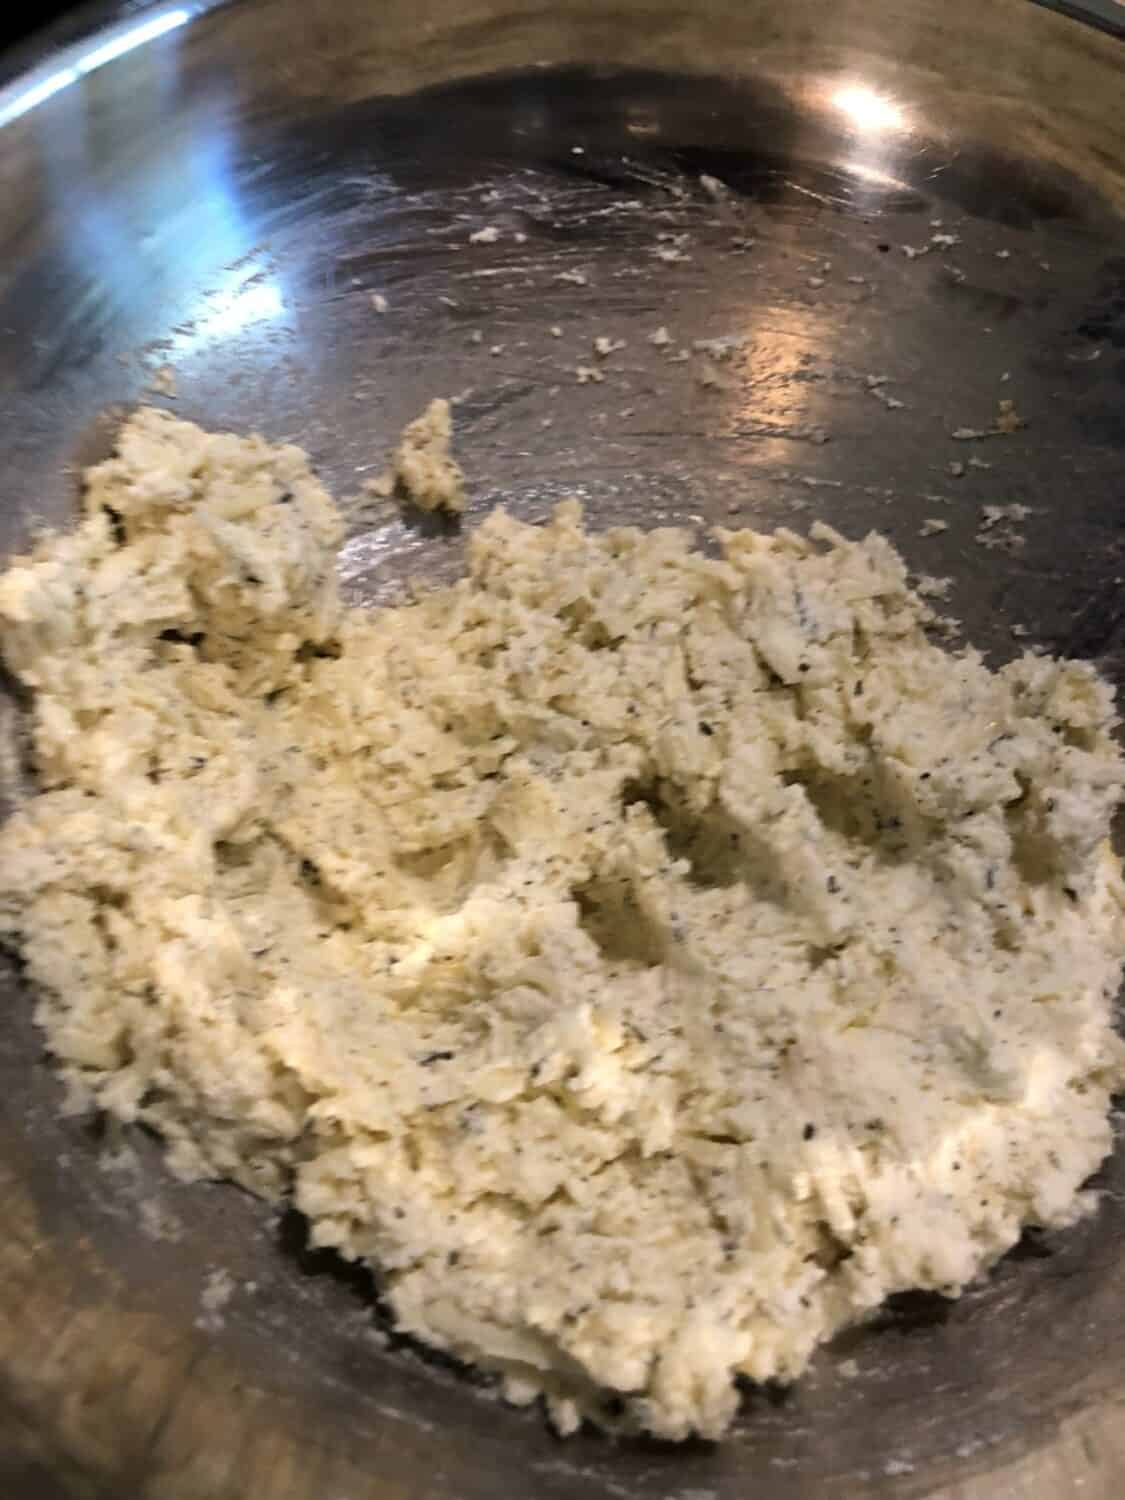
- While pasta cooks, combine ricotta, 2 1/2 cups of the mozzerella, parmesan, egg, dried parsley, salt, and pepper in a bowl with a spoon. Set aside.
- Drain and then, rinse the pasta in cold water. Set pasta on the counter in a single layer-I spray the counter with a little cooking spray.
- Fill the manicotti shells with the cheese mixture-divide evenly.
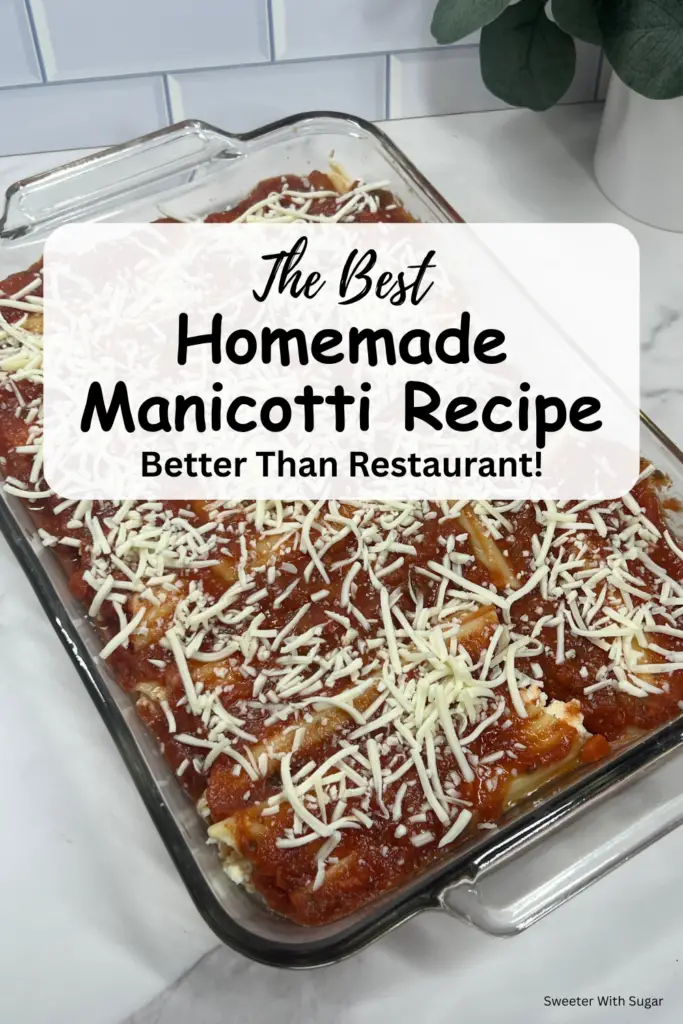
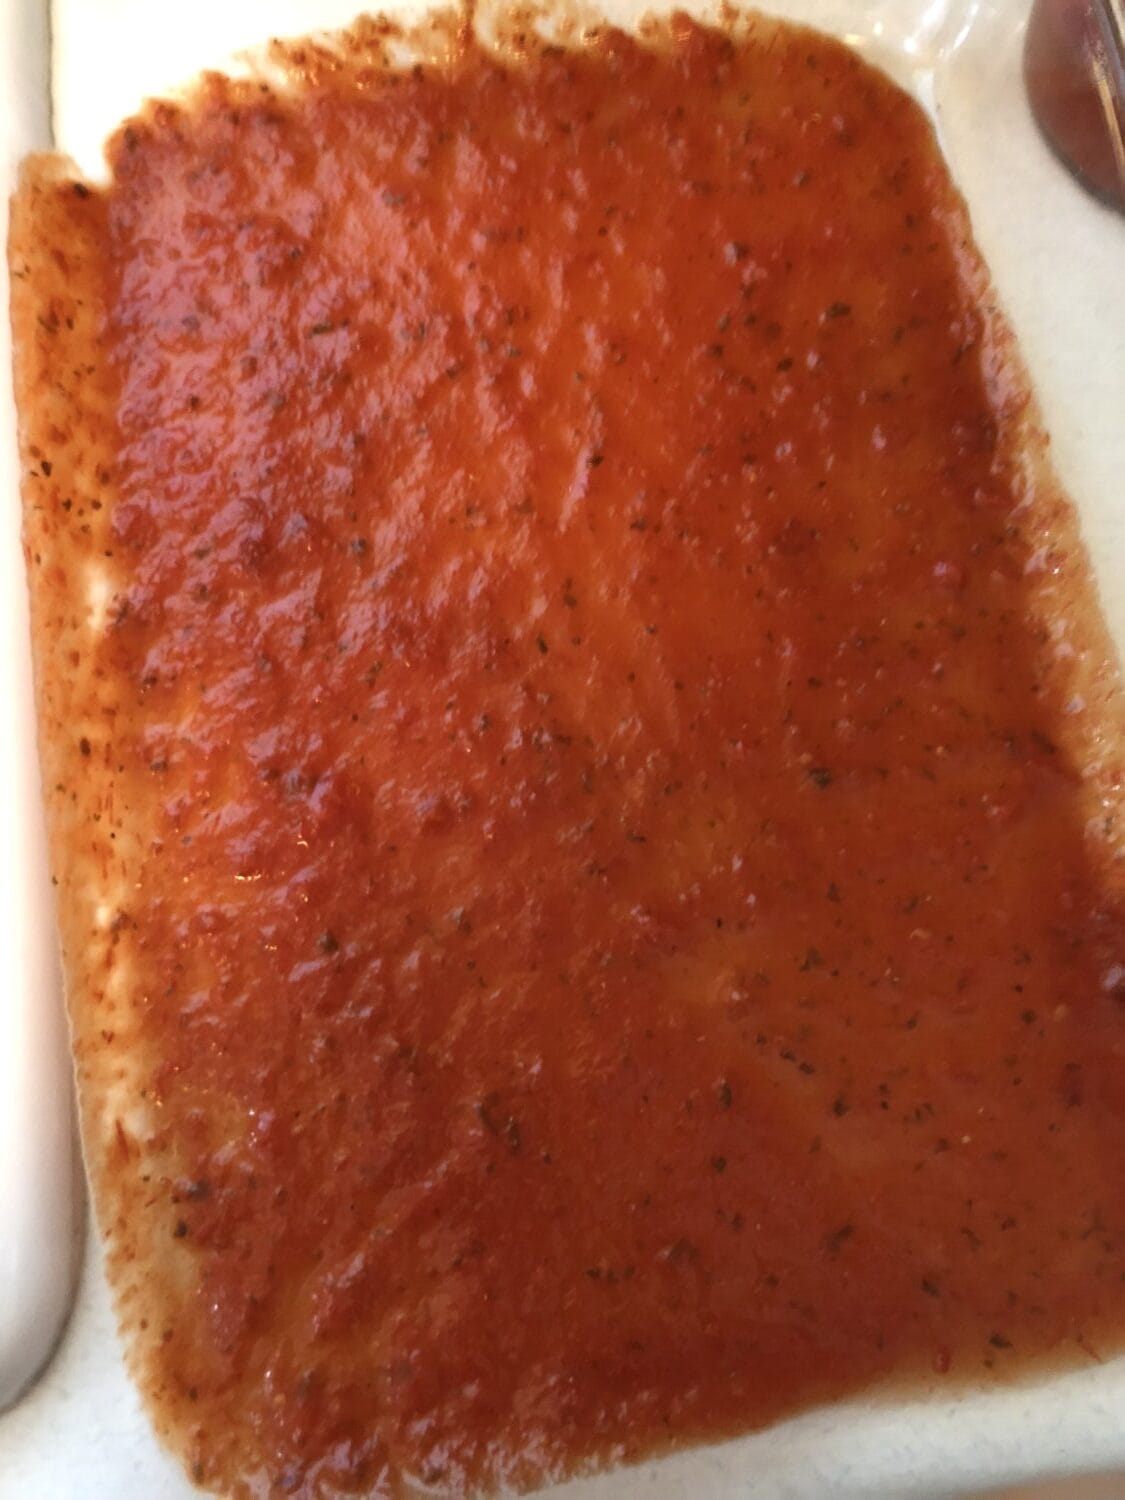
- Pour a little bit of the spaghetti sauce into the bottom of a 9 x 13 baking dish.
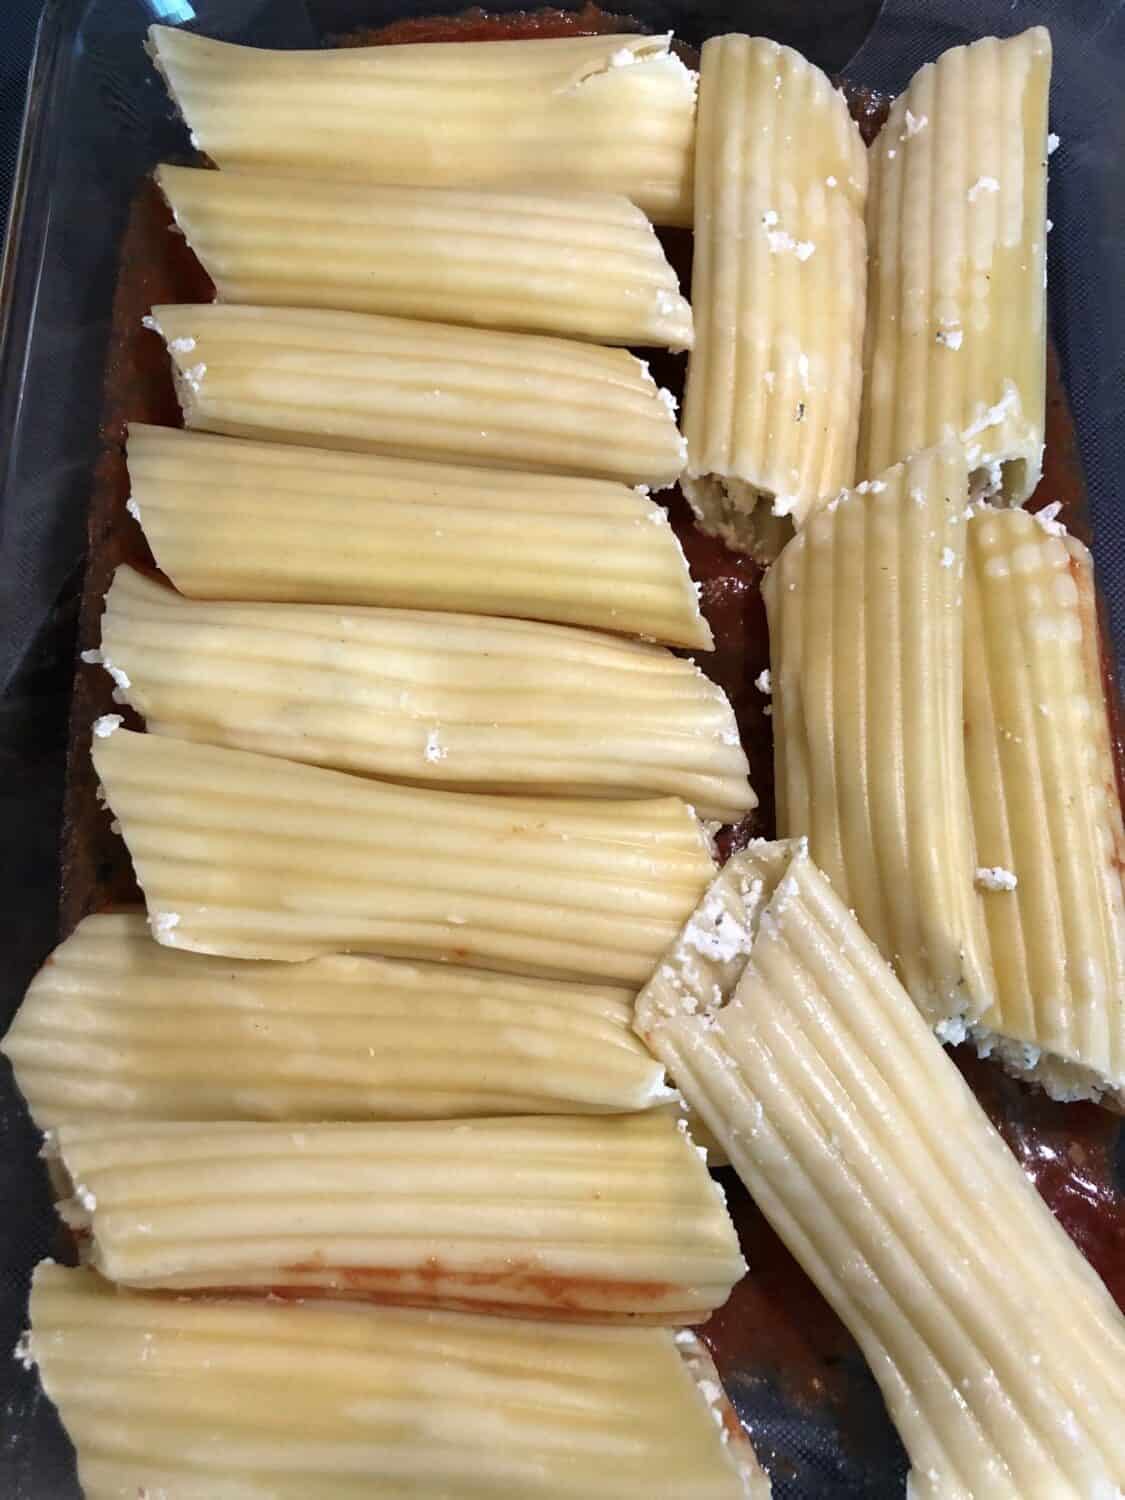
- Lay filled pasta shells in the 9 x 13 baking dish.
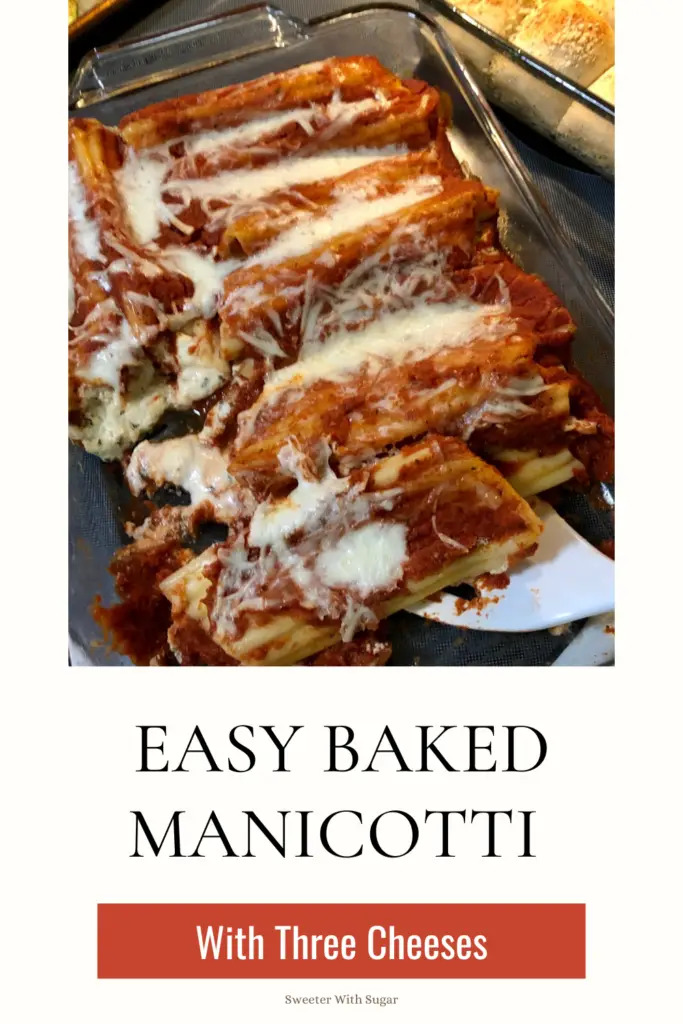
- Cover the shells with the remaining spaghetti sauce.
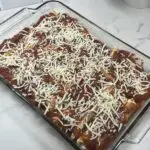
- Top with the 1/2 cup of reserved grated mozzerella cheese.
- Cover with foil and bake at 350 degrees for 45 minutes.
- Enjoy!
Picture Instructions:
While the pasta is boiling, combine ricotta cheese, 2 1/2 cups of the mozzarella cheese, parmesan cheese, egg, dried parsley, salt, and pepper. Mix with a spoon until well blended. Set aside.
Pour some of the marinara sauce in the bottom of a 9 x 13 baking dish. If you want to make your own marinara sauce-go for it. Otherwise, jar spaghetti/marinara sauce works very well. I like to keep this recipe simple, so jarred sauce is perfect!
Drain the al dente cooked shells. Then, fill the cooked manicotti pasta shells with the three cheese mixture using a piping bag, Ziploc bag with a corner cut off, or your hands and place them in the baking dish. Using your hands may be a bit messy but, it works too. Divide the cheese mixture as evenly as possible between the 14 manicotti shells.
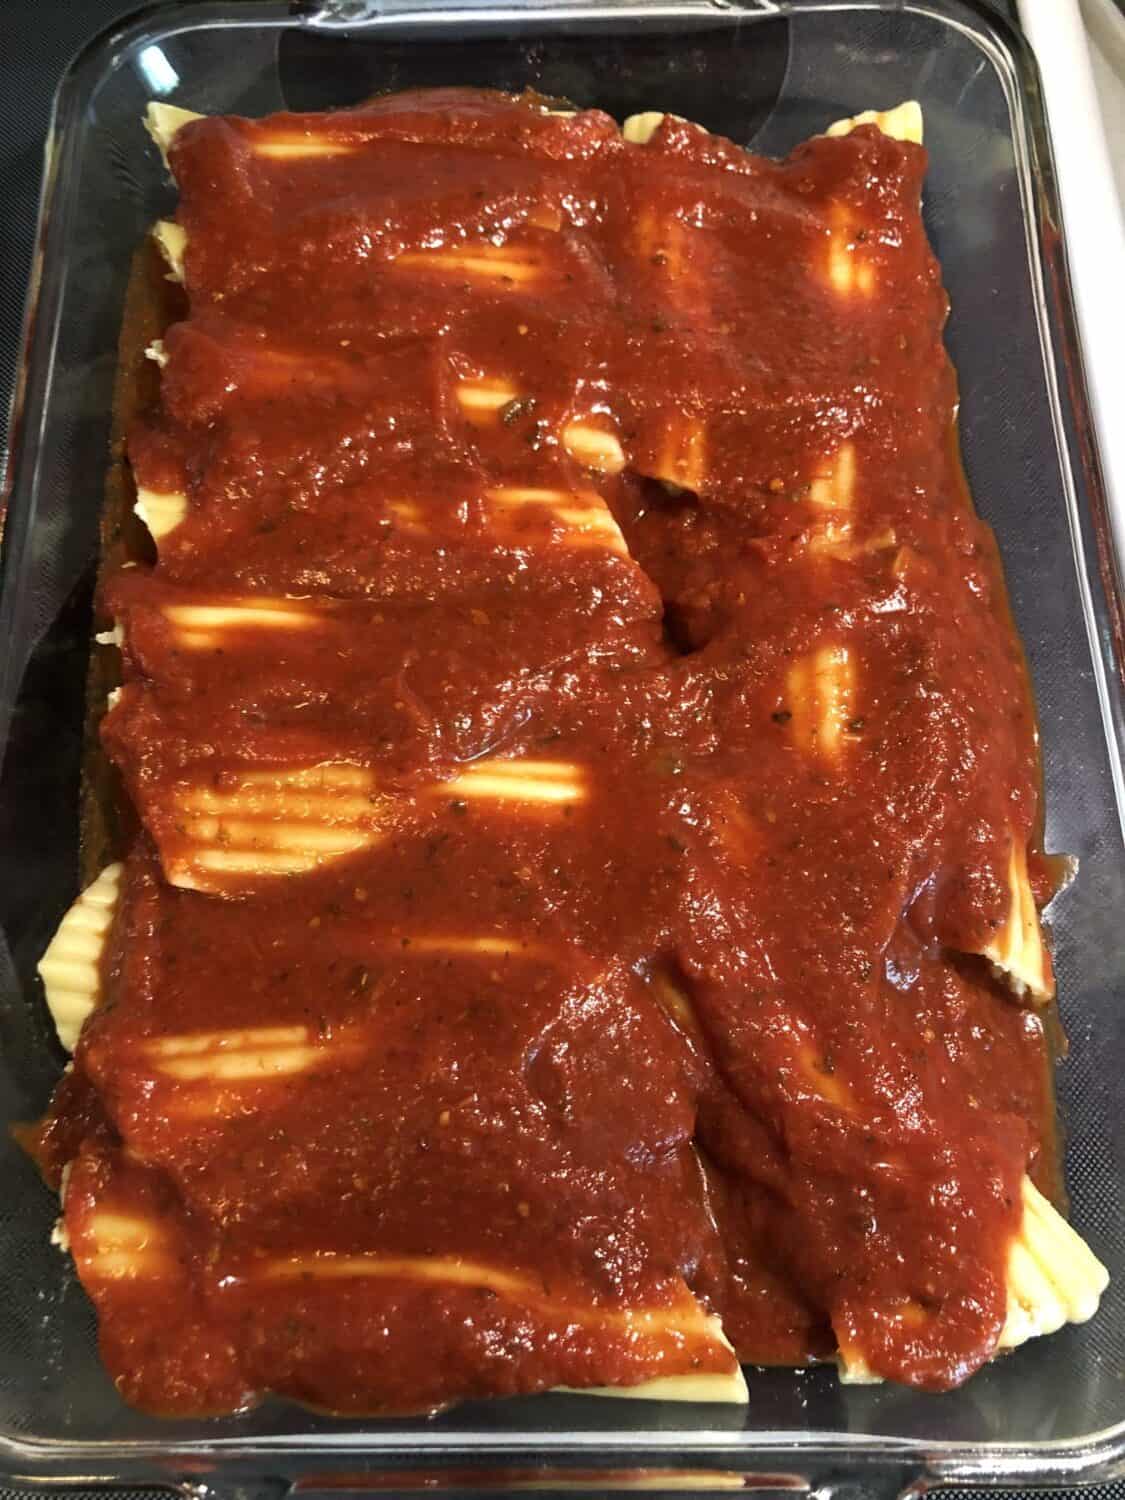
Cover the filled shells with the remaining spaghetti sauce. Then, top the spaghetti sauce with the 1/2 cup (or more, as desired) of the reserved mozzarella cheese.
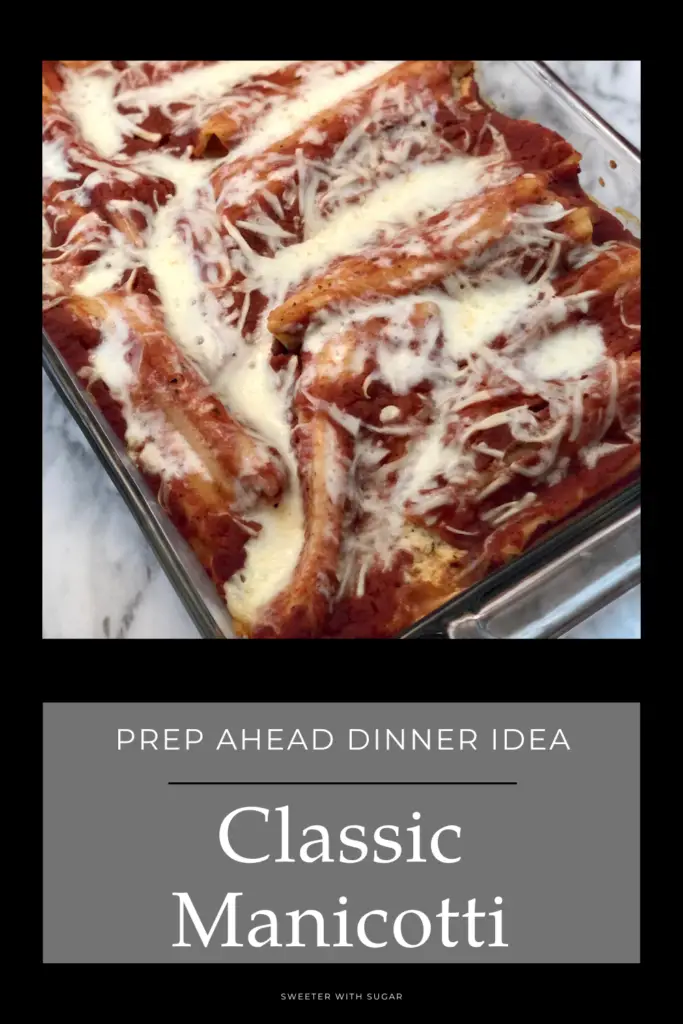
Cover the baking dish with aluminum foil and bake at 350 degrees for 45 minutes. If dish has been refrigerated, extend the cooking time by 5 or possibly 10 minutes. Check at 45 minutes to see if the center is hot and bubbly. Enjoy this easy, delicious and comforting Italian dinner recipe!
Serve with your favorite vegetable and garlic bread, if desired (Links are above for our favs). Also, try this delicious easy roll recipe: Buttery Italian Dinner Rolls.
Other Pasta Recipes You Will Love: ❤️
Three Cheese Italian Pasta Bake
Classic Manicotti Recipe
This classic Italian manicotti recipe is simple, delicious, and full of cheesy goodness. A perfect pasta dinner for any night of the week!
Ingredients
- 15 ounces Ricotta cheese
- 3 cups mozzerella cheese grated and divided
- 1/3 cup parmesan cheese
- 1 egg
- 2 tsp dried parsley
- 1/2 tsp salt
- 1/4 tsp pepper
- 24 ounces spaghetti sauce
- 8 ounces manicotti pasta shells
Instructions
-
Bring a pot of water to a boil. Place manicotti pasta shells in the boiling water. Boil no longer than 7 minutes.
-
While pasta cooks, combine ricotta, 2 1/2 cups of the mozzerella, parmesan, egg, dried parsley, salt, and pepper in a bowl with a spoon. Set aside.
-
Drain and then, rinse the pasta in cold water. Set pasta on the counter in a single layer-I spray the counter with a little cooking spray.
-
Fill the manicotti shells with the cheese mixture-divide evenly.
-
Pour a little bit of the spaghetti sauce into the bottom of a 9 x 13 baking dish.
-
Lay filled pasta shells in the 9 x 13 baking dish.
-
Cover the shells with the remaining spaghetti sauce.
-
Top with the 1/2 cup of reserved grated mozzerella cheese.
-
Cover with foil and bake at 350 degrees for 45 minutes.
-
Enjoy!
Disclaimer:
All of the thoughts and opinions here, on our family food and recipe blog, are our own. The affiliate links (if you click on one or more) here pay us a tiny commission that will not cost you anything. The commissions help us run this web-site. We appreciate your support! Thank you so much!
We all want to thank you for visiting and trying recipes from our family recipe blog. Your support is very much appreciated. All of us are hoping that all of you are staying healthy, strong and happy. Have a fantastic day and an even better week. Have fun cooking and remember to get the kids involved where it is safe to do so. They may love it and it is a great activity for quality family time. Family and friends are the best!
Take time to comment 😊
We would love to hear from you about: what you liked about this recipe, changes you made and if they were good or not so good, other ideas to go along with this recipe, and other recipe ideas you would like to see from us-Sweeter With Sugar. We love to see your comments and always try our best to make delicious recipes. We know, even in our own family, peoples tastes differ widely. We hope you find this recipe delicious and are excited to try some more of our recipes.
We can’t claim to please all people all the time, but we wish we could. It is definitely difficult feeding many people-cutting out things like onion, or dairy for those lactose intolerant, wheat for some people cutting out wheat or soy. Meals can be trying. Who knew when I became an adult, it would be my job for the rest of my life to plan for all of the meals, shop for all of the meals, prep and cook all the meals, and make things that fit into everyones wants. We are nearing 1,000 recipes on this blog and have worked hard to get you recipes in hopes that we make your meal planning, party planning etc more enjoyable, easier and delicious!
Super easy. Family loved it
I am so happy to hear this recipe was super easy and that your family loved it!! Thank you for reaching out and trying our recipe!! 💕